[Motherboard]How to turn off some CPU cores under BIOS
Catalog:
I: How to turn off some CPU cores (i.e. CCD) on AMD series motherboards?
II:How to turn off some CPU cores (i.e. E-core) on Intel series motherboards?
I: How to turn off some CPU cores (i.e. CCD) on AMD series motherboards?
(Example: Motherboard ROG STRIX X670E-E GAMING WIFI with CPU AMD Ryzen 9 9950X)
1. Under Windows system, right-click on the taskbar, then click on [Task Manager], and make sure the number of CPU Cores is 16, as shown below: 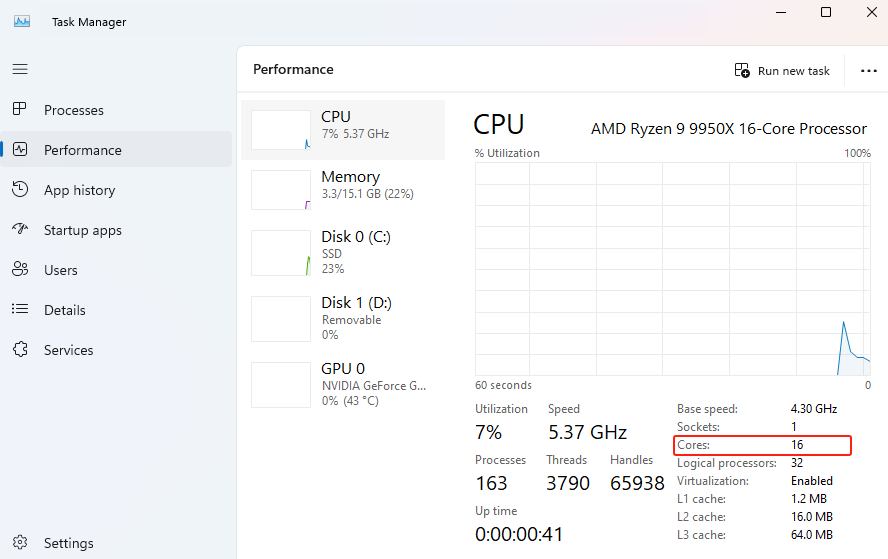
2. After restarting the computer, press the “delete” or “F2” key on the keyboard to enter the BIOS [EZ Mode]. 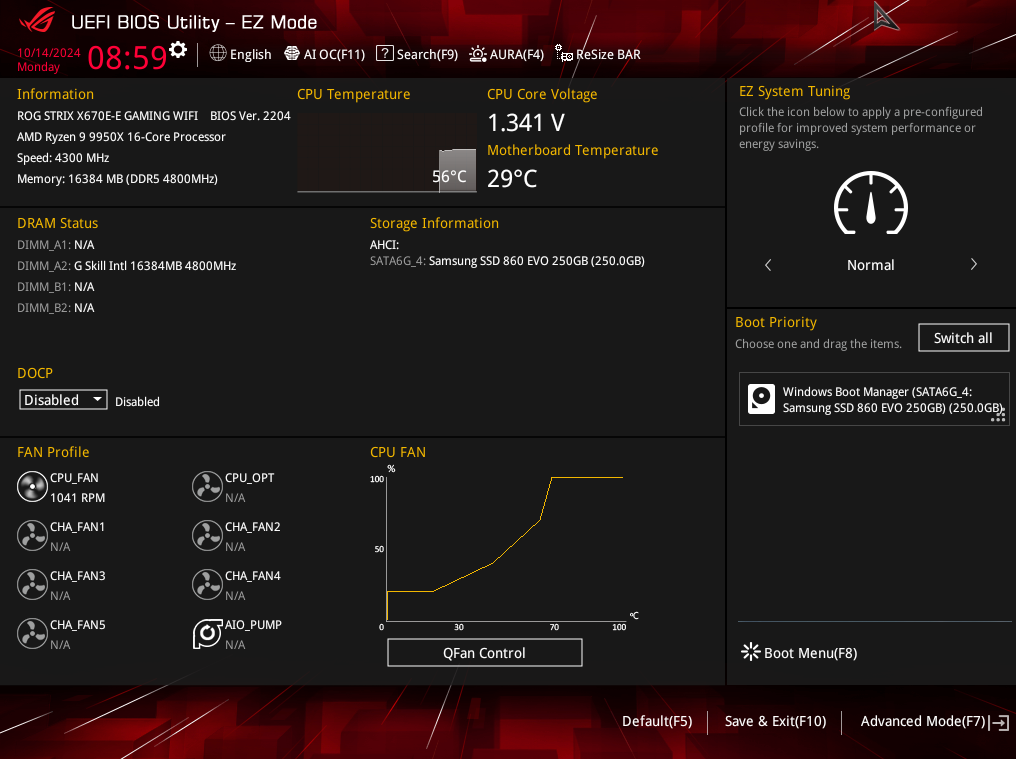
3. Press the F7 key on the keyboard to enter [Advance] Mode, click [AMD Overclocking], as shown below 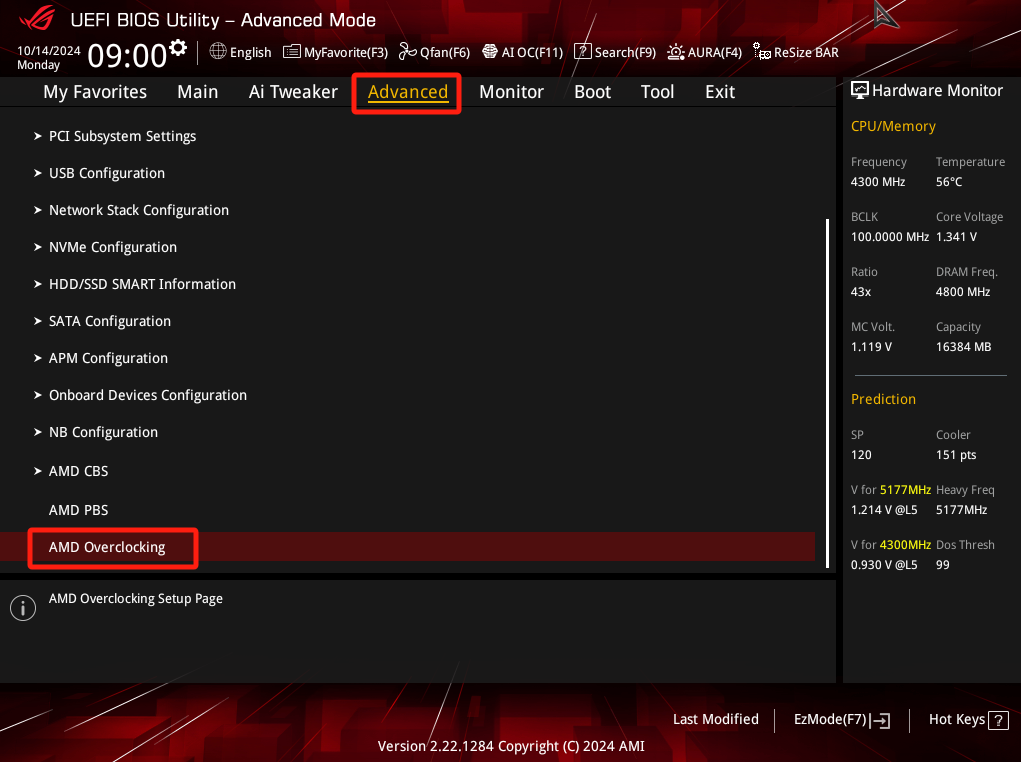
4. Click [Accept],as shown below 
5. Enter [Manual CPU Over clocking], as shown below 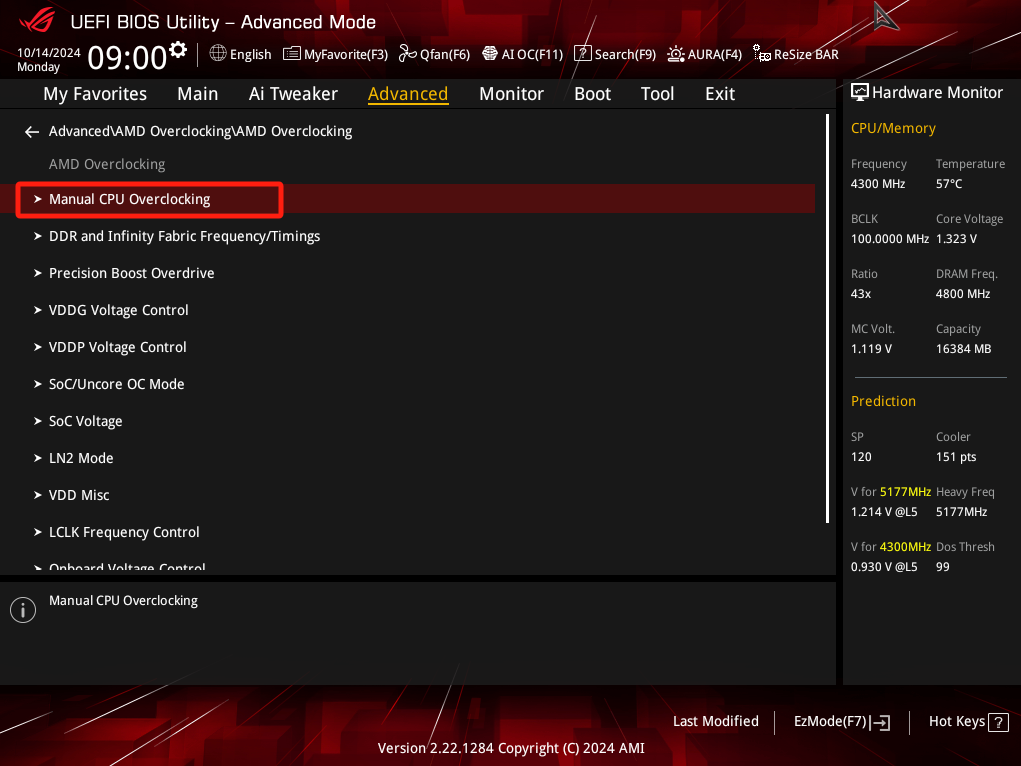
6. Click [CPU Core Count Control], as shown below 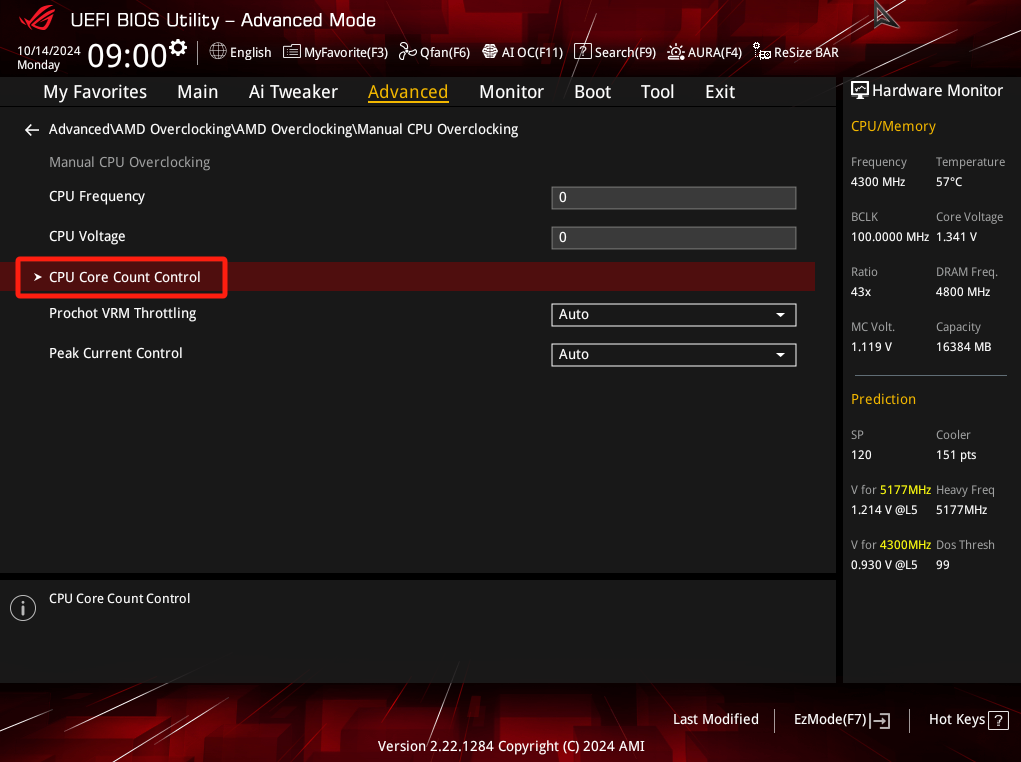
7. Click [ CCD 01 Bit Map Down Core Control], as shown below 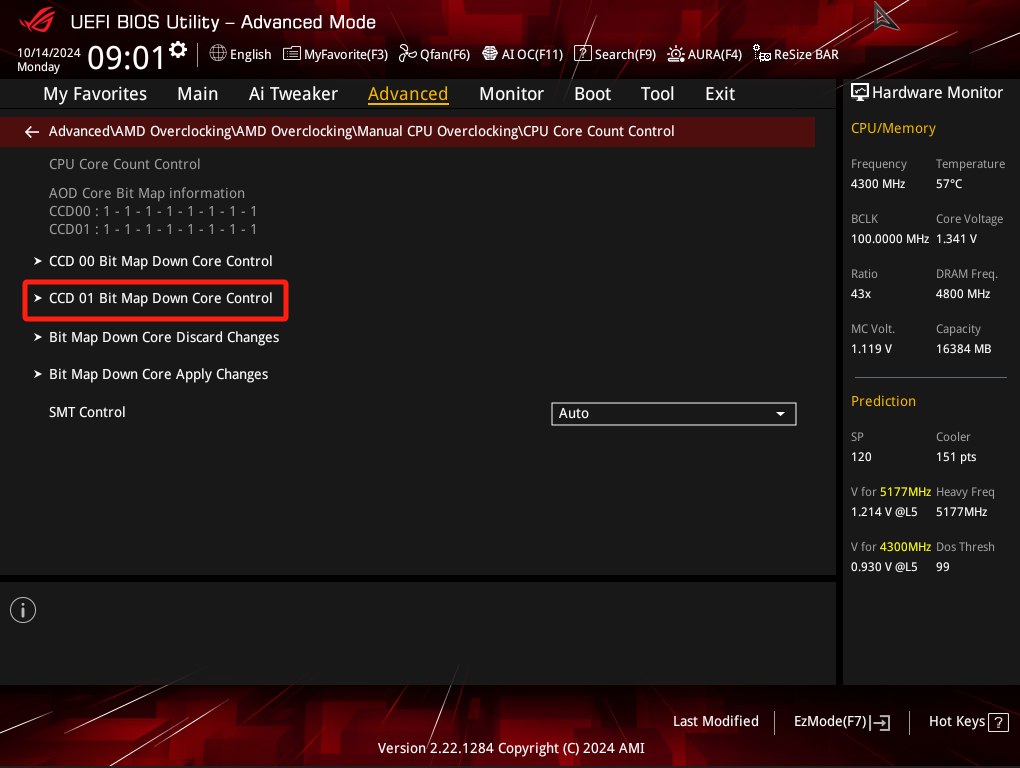
8. Enter the number 0 or 1 in the [Modify] field of the pop-up dialog box.
0 means off, 1 means on
As shown below 
9. As an example, press [0] on the keyboard eight times to turn off the eight cores. 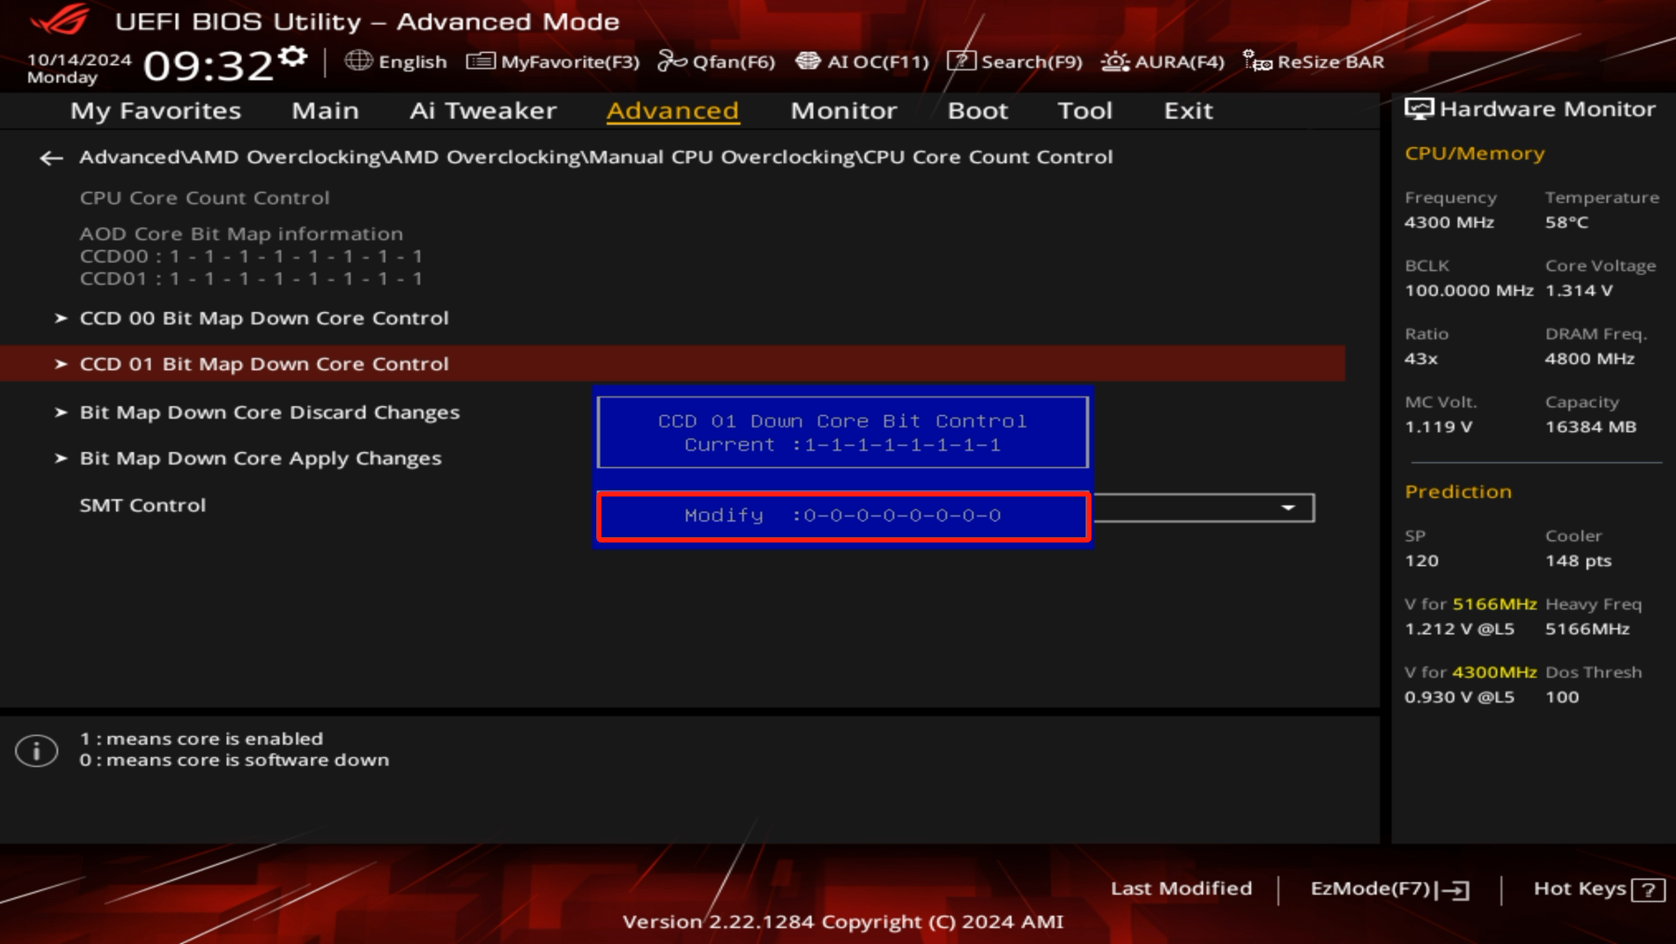
10. Press the [Enter] key on the keyboard after setting, the setting result of CPU CCD01 core is 0 as shown in the red box below: 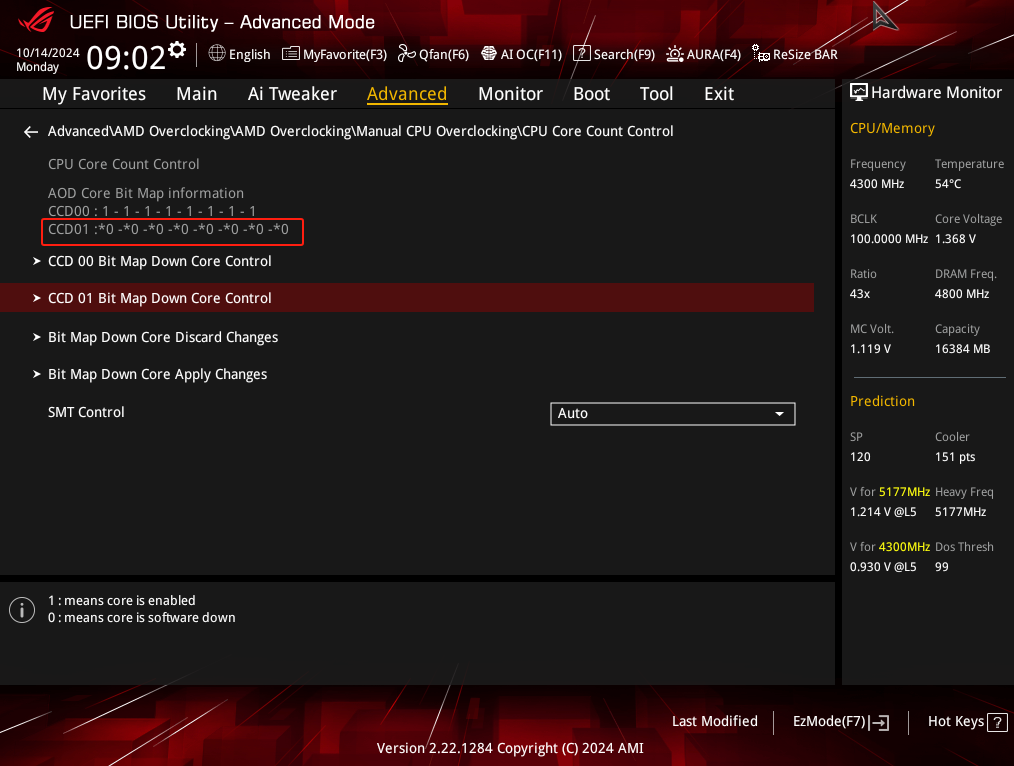
11. Click [Bit Map Down Core Apply Changes],a prompt appears: Save and Apply the settings, press any key to save and restart, as shown below: 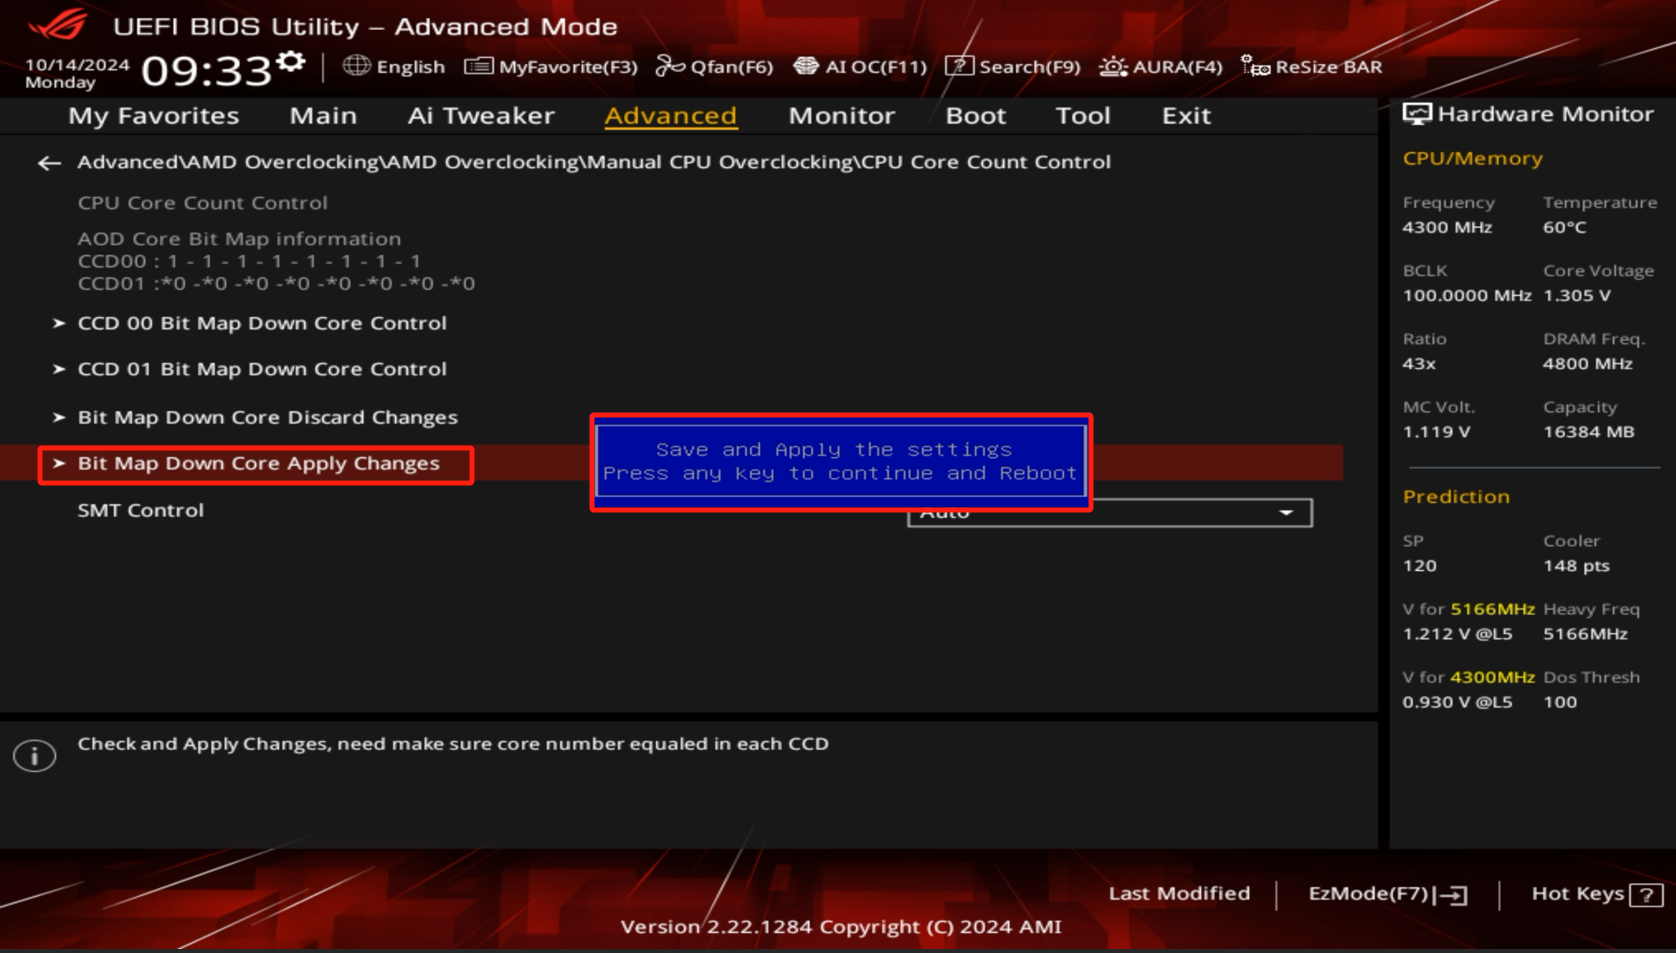
12. After rebooting into Windows, right-click on the taskbar, and then click on [Task Manager] to make sure that there are 8 CPU cores left and 8 have been turned off, as shown below:

II: How to turn off some CPU cores (i.e. E-core) on Intel series motherboards?
CPU cores are designed to have high performance cores (also known as P-cores, Performance Cores) and high efficiency cores (also known as E-cores, Efficiency Cores).
The specifications of the CPU core design you are using can be found on Intel's website.
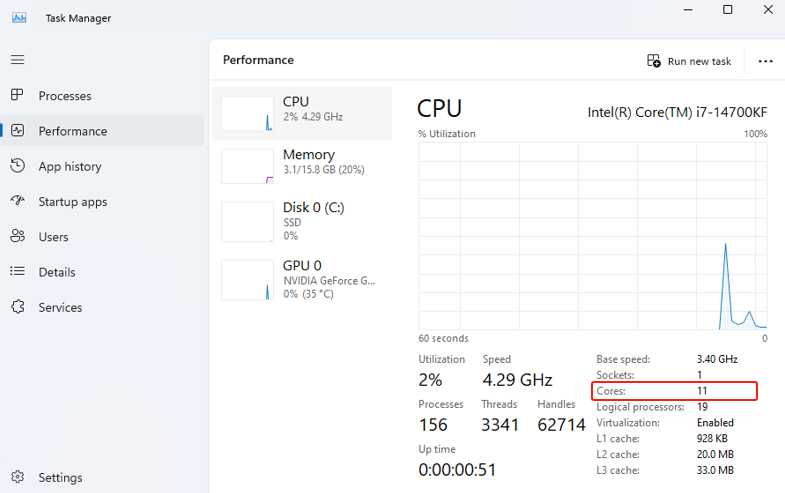
(Example: ROG MAXIMUS Z790 EXTREME with CPU I7 14700KF, turned off E-core)
1. Under Windows system, right-click on the taskbar, and then click on [Task Manager] to make sure the number of CPU Cores recognized is 20: 
2. After restarting the computer, press the “delete” or “F2” key on the keyboard to enter the BIOS [EZ Mode]. 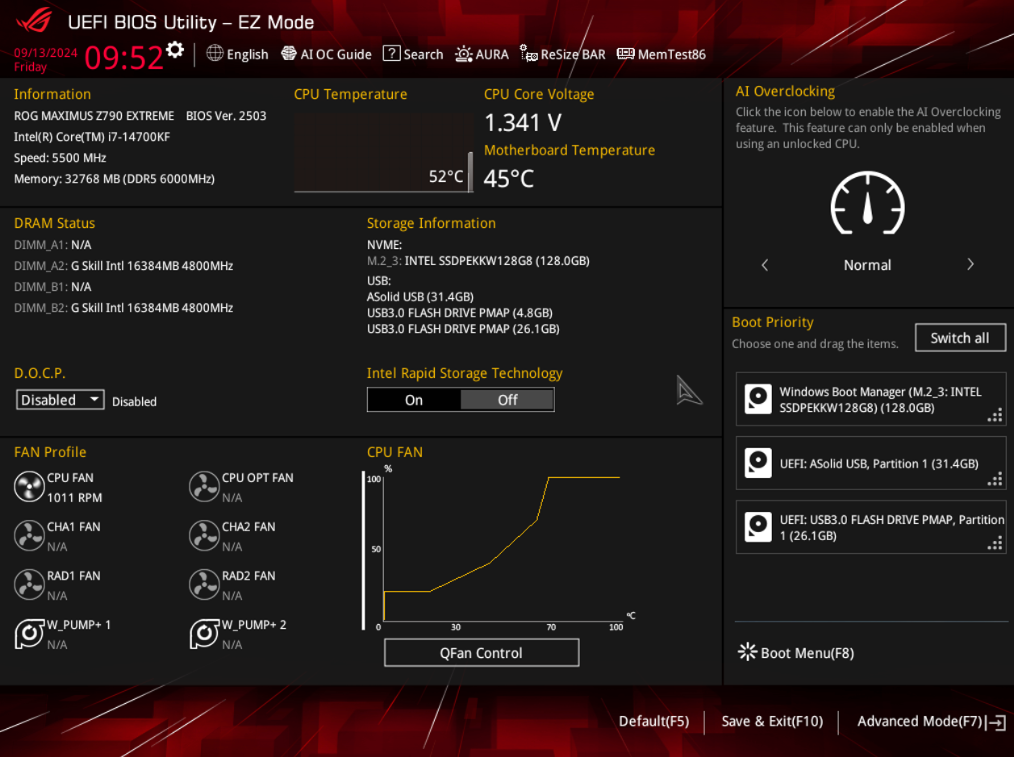
3. Press the F7 key on the keyboard to enter [Advance] Mode, click [CPU Configuration], as shown below 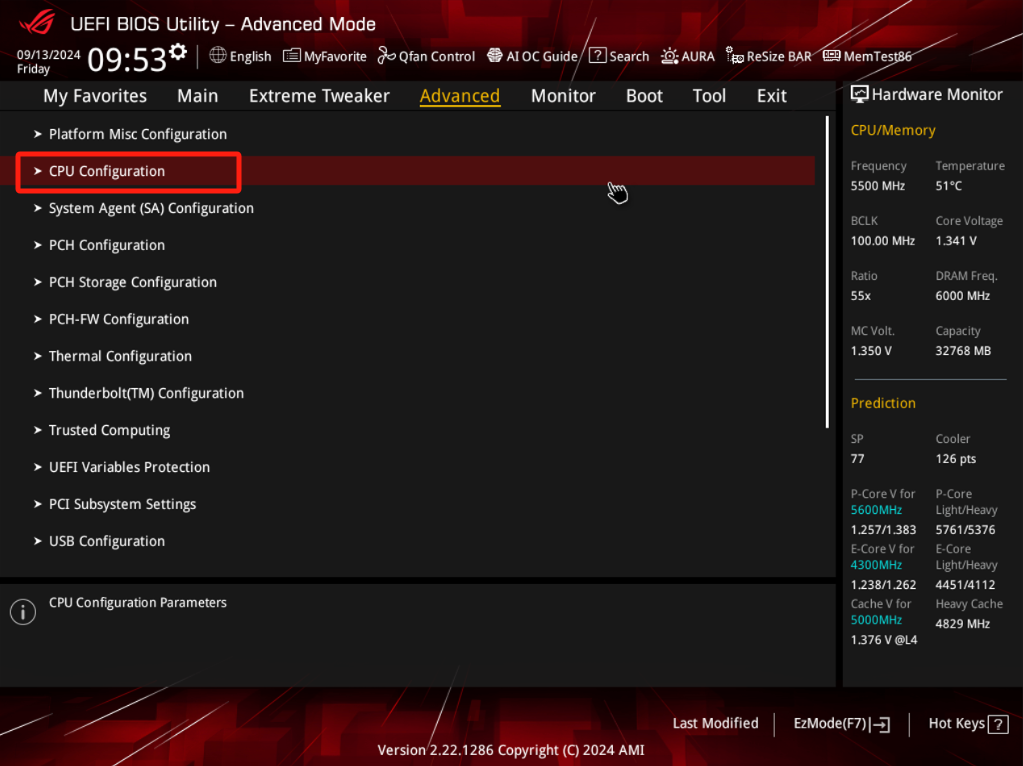
4. There are two methods to turn off E-Core
Method 1: Customize the E-Core you want to turn off.
a. Click [Per E-Core Control] and select [Enable], as shown below 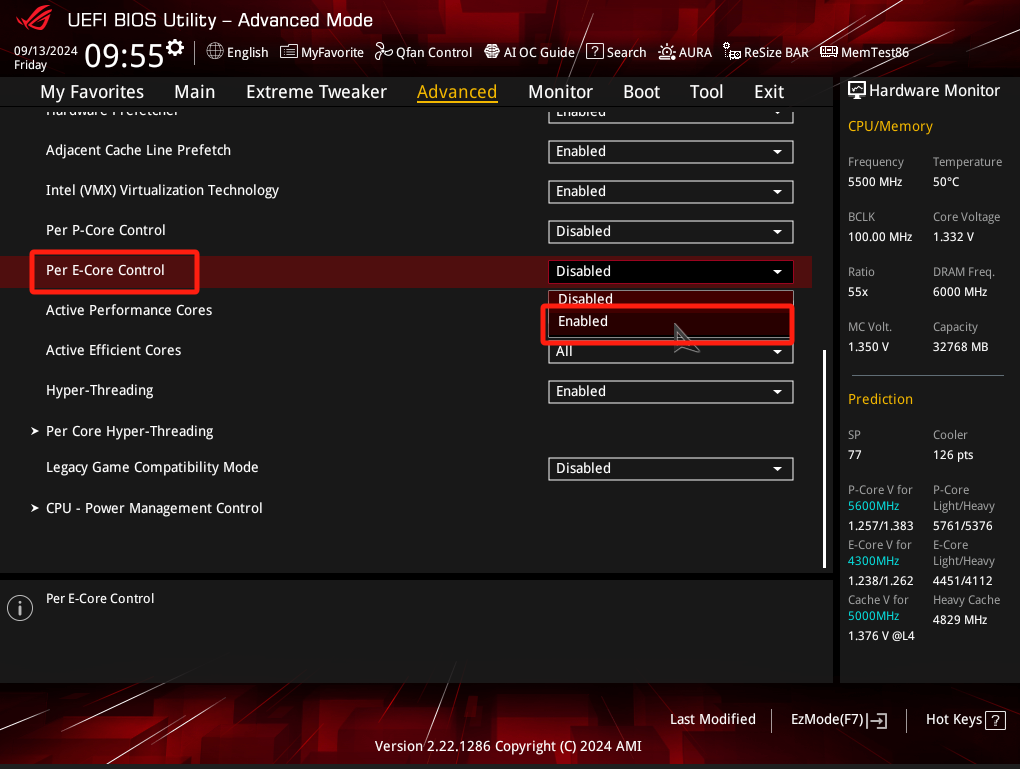
b. Customize which E-Core is disable, for example: Disabled E-Core 0, E-Core 1, E-Core 2. 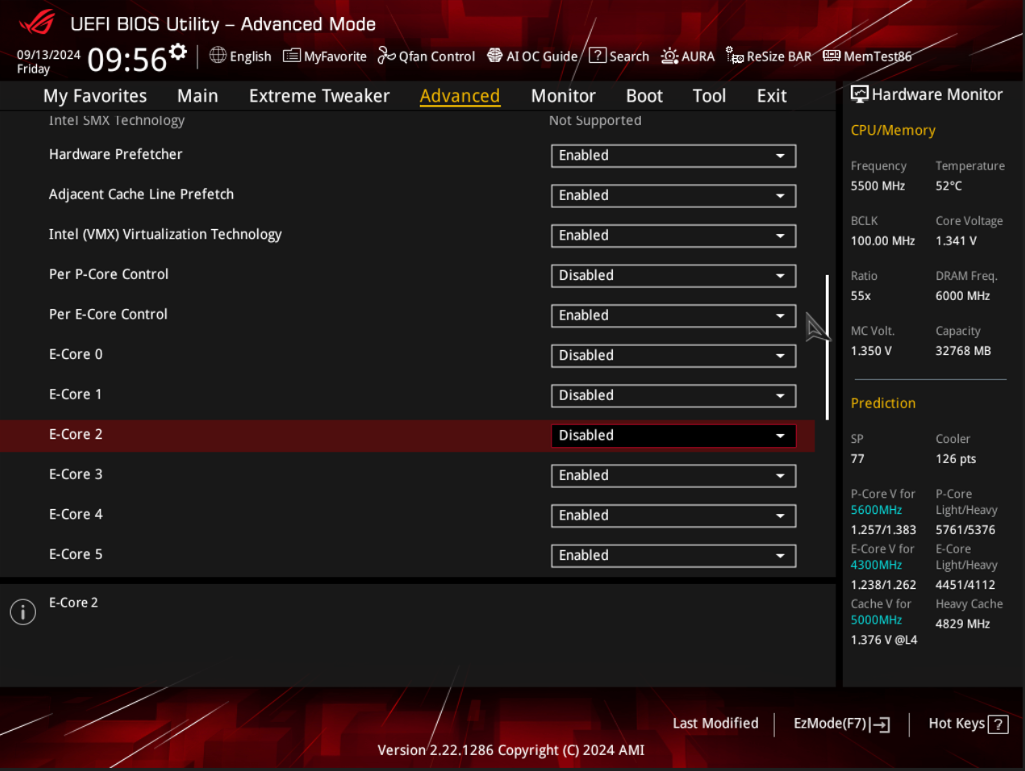
c. Press the “F10” key on the keyboard, click Ok, save and restart. 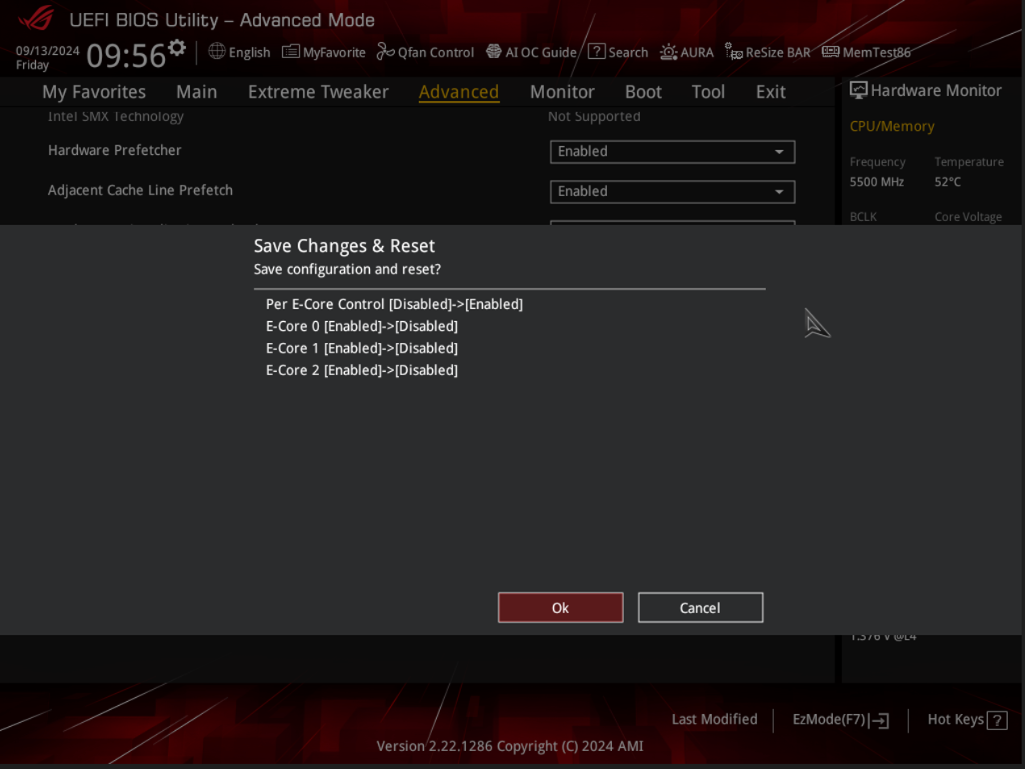
d. After rebooting into Windows, right-click on the taskbar, and then click on [Task Manager] to make sure the number of CPU Cores is recognized as 17, and 3 CPU cores have been turned off, as shown below:

Method 2:Customize the number of E-Core you want to turn on.
a. Click [Active Efficient Cores], and customize the number of E-Cores you want to turn on, for example, the number of E-Cores to turn on is 3 (thus, the number to turn off is 9) 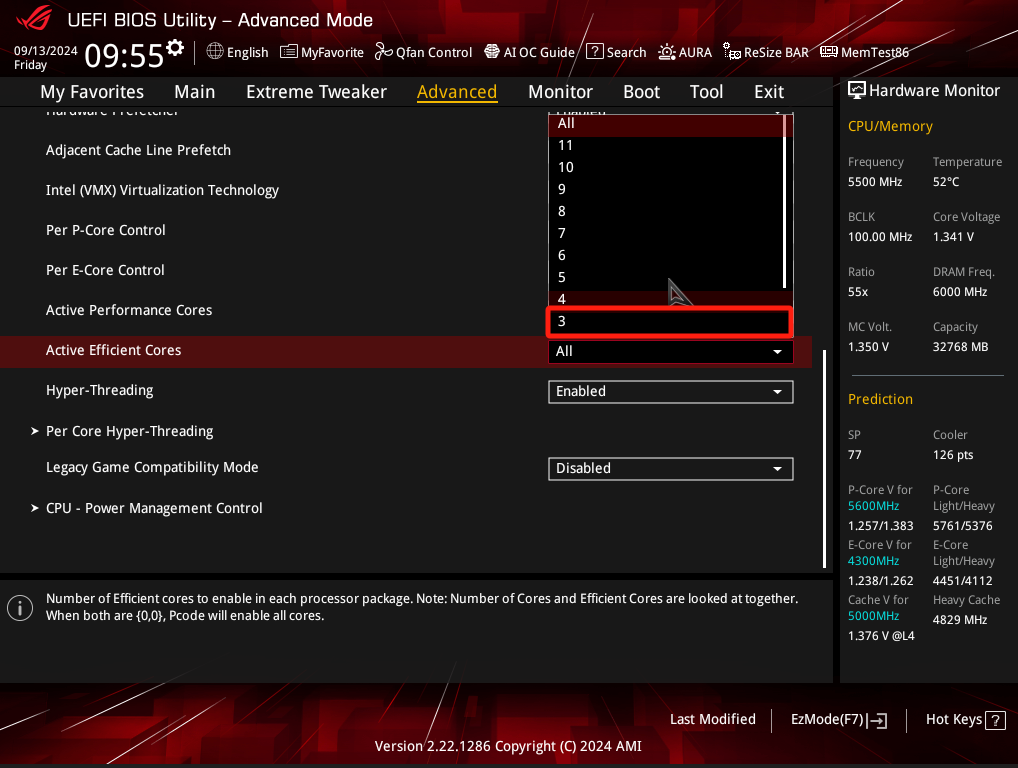
b. Press the “F10” key on the keyboard, click Ok, save and restart. 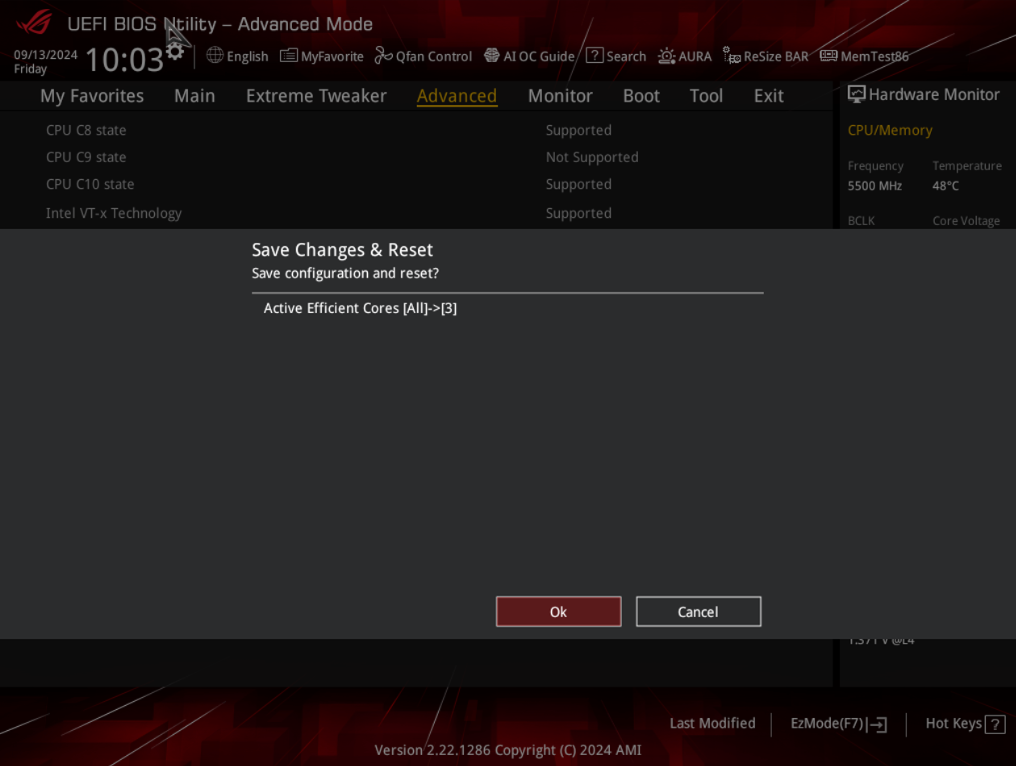
c. After rebooting into Windows, right-click on the taskbar, and then click on [Task Manager] to confirm that the number of CPU Cores is recognized as 11, and 9 CPU cores have been turned off, as shown below